
How to Remove Gel Nails Without Acetone: 4 Gentle Methods That Actually Work

Gel nails look incredible — until it is time to take them off. Most people reach for acetone without thinking twice, but repeated use leaves nails thin, dry, and stripped of moisture. The good news is that acetone is not your only option. There are kinder, gentler ways to remove gel polish at home that still work beautifully. Your nails deserve better than a harsh chemical soak every few weeks. With the right technique and a little patience, you can lift gel polish without any damage at all.
Below are the key methods for removing gel nails without acetone — plus why it matters, what to avoid, and how to care for your nails after removal.
Why You Might Want to Skip Acetone
Before jumping into the removal methods, it helps to understand exactly why avoiding acetone can benefit your nail health long-term. This context makes it easier to stay committed to gentler approaches.
Dehydration damage: Acetone strips natural oils from the nail plate, leaving nails visibly white, chalky, and feeling paper-thin after use. Weakening over time: Frequent acetone exposure gradually thins the nail plate, making nails more brittle and prone to breaking easily. Dry cuticles: The skin surrounding your nails absorbs acetone too, which leads to painful cracking, peeling, and irritated cuticle edges. Sensitivity concerns: People with sensitive skin or nail conditions often experience discomfort, redness, and prolonged dryness after acetone contact. Better alternatives exist: Modern acetone-free removal options are now genuinely effective, making the switch both practical and worth committing to.
Method 1: Warm Water and Oil Soak
This is the gentlest and most nourishing approach to gel removal without chemicals. It works by softening the gel bond over time using warmth and natural oils to loosen the polish from the nail surface.
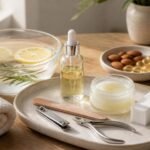
Water temperature: Use comfortably warm water — not hot — as excessive heat can cause skin irritation and actually slow the softening process. Oil choice: Cuticle oil, coconut oil, olive oil, or sweet almond oil all work well — choose whichever you have available at home. Soak duration: Keep fingers submerged for 15 to 20 full minutes without interruption to allow the gel edges to soften adequately. Dish soap boost: Add a small drop of dish soap to the water to help gently break down the gel polish bond more effectively. Removal step: After soaking, use a wooden orange stick or rubber-tipped cuticle pusher to nudge the softened edges of gel upward slowly.
Method 2: The Nail Buffer Technique
If you prefer a dry method with no soaking involved, buffing is a reliable acetone-free way to gradually remove gel polish layer by layer. It requires patience but is highly effective when done carefully.
Start with coarse grit: Use a 100 or 180-grit nail file to break through the top shiny coat of the gel — this is the seal that locks everything in. Work in sections: Focus on one nail at a time and file in gentle, even strokes rather than pressing hard across the whole surface at once. Switch to medium grit: Once the shine is gone, move to a medium buffer to thin out the remaining gel layers gradually and evenly. Watch for the transition: When the color starts disappearing and the surface dulls, you are close to the natural nail — slow down significantly. Finish with fine buffer: A fine-grit buffer smooths the natural nail surface after all gel is gone and removes any rough texture remaining.
Method 3: Acetone-Free Gel Removal Kit
Dedicated acetone-free removal kits have improved significantly and are now a practical, salon-quality option you can use at home. These kits are specially formulated to break down gel polish without the harsh chemical damage of traditional acetone products.
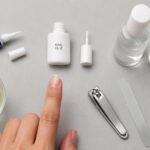
What to look for: Choose kits specifically labeled acetone-free — they typically combine gentle alcohol-based solvents with nourishing conditioning oils. Plastic clip wraps: Most kits include reusable plastic nail wraps that hold the remover solution against the nail surface for effective contact. Timing matters: Follow kit instructions precisely — typically 10 to 15 minutes of contact time is needed before the gel begins to lift cleanly. Gentle removal: After the set time, use the included wooden stick to slide the loosened gel away from the nail in smooth, even strokes. Post-kit care: Even with gentle kits, always apply cuticle oil and hand cream immediately after removal to restore hydration to the nail area.
Method 4: Peel-Off Base Coat for Future Removal
This method is less about removing current gel and more about making your next removal effortless from the very start. A peel-off base coat creates a non-bonding layer between your natural nail and the gel polish above it.
How it works: The peel-off base coat does not cure as hard as regular base coats, leaving a flexible layer that allows gel to lift off cleanly. Application tip: Apply one thin layer of peel-off base and let it dry fully before applying your regular gel base and color on top. Removal day: When ready to change color, simply insert an orange stick under the free edge and the entire gel set peels away in one piece. Wear time trade-off: Peel-off base coats reduce longevity slightly — expect about one week of wear compared to two or more with standard base coats. Best for: Frequent color changers who love having fresh nails every week and want zero chemical exposure during every removal session.
Aftercare for Healthy Nails Post-Removal
No matter which removal method you choose, your nails need intentional care immediately after the gel comes off. Skipping aftercare is where most people make their biggest nail health mistakes.
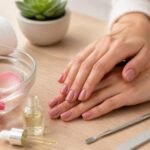
Apply cuticle oil immediately: Massage oil into every nail and cuticle right after removal to restore hydration and prevent surface peeling. Use a strengthening treatment: A nail hardener or keratin-based treatment applied after removal helps rebuild nail plate density and resilience quickly. Give nails breathing time: Wait at least two to three days before applying new polish so nails can stabilize and recover their natural flexibility. File and smooth edges: Lightly file any uneven or rough edges after removal to prevent snagging, peeling, and further damage to the nail tip. Moisturize hands daily: Apply a rich hand cream morning and evening for several days post-removal to support full skin and nail recovery.
Common Mistakes to Avoid During Gel Removal
Even with gentle methods, a few bad habits can still cause nail damage during the removal process. Knowing what not to do is just as important as knowing the right technique.

Never peel or rip: Pulling gel off before it is properly loosened tears away the top layers of the natural nail plate with it — always. Avoid metal scrapers: Sharp metal tools used with force can gouge the nail surface and cause micro-damage that takes weeks to grow out. Do not rush buffing: Filing too aggressively or too quickly generates friction heat that weakens the nail and causes painful thinning of the plate. Skip the shortcuts: Trying to peel, bite, or pick at lifting edges only damages the nail bed and makes the next gel application uneven. Do not skip aftercare: Removing gel without following up with moisture and strengthening products is one of the fastest ways to ruin nail health.
Frequently Asked Questions
Can warm water alone remove gel nail polish effectively? Warm water alone softens the gel slightly but works much better when combined with oil and a small amount of dish soap for proper lifting.
How long does the nail buffer method take to remove gel polish? Depending on gel thickness, buffing typically takes 10 to 20 minutes per hand when done carefully — patience is the key to avoiding nail damage.
Are acetone-free removal kits as effective as acetone for removing gel? They are highly effective for most gel polishes. Hard builder gels may require longer contact time, but standard gel color and top coat lifts well.
Will the peel-off base coat method work with any gel polish brand? Yes, a peel-off base coat works under most gel polish brands, though wear time may vary slightly depending on the top coat and lamp used.
How often should I give my nails a break between gel manicures? Aim for a break of at least three to five days between gel applications, or a full week off every two to three months for deeper recovery.
Is it safe to use the buffer method on thin or damaged nails? Very gentle buffing with a fine-grit buffer is safe, but if nails are already very thin, the warm water soak or peel-off base coat method is safer.
What Your Nails Are Actually Trying to Tell You
Nails do not lie. When they turn white after acetone, peel after buffing, or feel painfully thin after removal, they are sending a clear message about how they have been treated. The nails that look and feel strongest are almost always the ones that have been removed gently, moisturized consistently, and given adequate recovery time between manicures.
Most nail damage that gets blamed on gel polish is actually removal damage. The gel itself does not thin your nails — improper removal does. That distinction matters because it means you have far more control over your nail health than you might think. Switching to an acetone-free method is not just a preference, it is one of the most impactful changes you can make for long-term nail strength.
Once you try a gentler method and see how your nails feel afterward, going back to harsh acetone feels unnecessary. Healthy nails look better under polish, last longer with a manicure, and grow stronger over time. Every gentle removal is an investment in the nails you will be wearing months from now.
Nails That Thank You Later
Removing gel without acetone takes a few extra minutes, but the difference in your nail health is absolutely worth it. Whether you choose a warm oil soak, careful buffing, a dedicated kit, or start using a peel-off base coat, each method respects your natural nails rather than stripping them down.
Keep your cuticle oil close, moisturize consistently, and never rush the removal process. The gentler you are today, the stronger and healthier your nails will be for your next manicure. That is a trade-off that always pays off.
Your nails work hard to look beautiful. Give them the care they deserve — starting with how you take the polish off.


