
How to Prep Your Nails for Polish Longevity: 7 Steps for a Chip-Free Manicure

Your nail polish should last more than two days. Most of the time, chipping and peeling have nothing to do with the polish brand. It all comes down to how well you prepared your nails before the first stroke of color. Skipping even one prep step can cause your manicure to lift, bubble, or crack early. The good news is that the process is simple, quick, and completely doable at home. Once you learn the right order and the right techniques, your manicure will look salon-fresh for days longer.
Below are 7 essential nail prep steps for polish longevity, picked for their impact, simplicity, and real-life results.
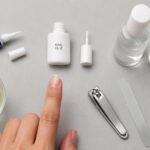
Step 1: Remove All Old Polish Completely
Starting fresh is the most important rule of any long-lasting manicure. Even a thin layer of leftover polish or residue will prevent your new color from bonding evenly to the nail surface.
Use the right remover: Choose an acetone-free formula for regular polish to avoid drying out the nail plate over time. Work nail by nail: Hold the soaked cotton pad on each nail for a few seconds before wiping to lift all color cleanly. Check the edges: Pay close attention to the sides and tip of the nail where old polish tends to cling and get missed. Go oil-free: After removing polish, wipe each nail again with a dry pad to remove any remover residue left behind. Why it matters: Any leftover pigment or oil creates a barrier that causes new polish to peel away from the nail faster.
Step 2: Trim and Shape Your Nails
The shape of your nails plays a bigger role in polish longevity than most people realize. Poorly shaped nails are more likely to snag, break, and cause lifting along the edges.
Trim first: Use nail clippers to bring nails to your desired length before picking up a file for shaping them. Best shapes for durability: Rounded, oval, and squoval shapes resist breakage far better than sharp square or pointed tips. File in one direction: Always move the file in a single sweeping motion — back-and-forth sawing weakens the nail structure badly. Smooth the tip: After shaping, gently glide the file across the tip edge to seal and smooth it for cleaner polish application. Avoid metal files: Glass or fine-grit files are gentler on nails and create less micro-damage than traditional metal emery boards.
Step 3: Buff the Nail Surface Gently
Buffing creates an even, smooth surface that helps polish grip the nail instead of sliding off. It also removes ridges and small imperfections that can ruin an otherwise flawless finish.
Use a light-grit buffer: A four-sided buffer block is ideal — start with the smoothing side and finish with the shine side carefully. Buff lightly: Gentle strokes are all you need — pressing too hard thins the nail plate and causes long-term weakness over time. Aim for matte: A slightly matte surface after buffing actually grips polish better than a naturally shiny nail would. Don’t skip ridges: If your nails have vertical ridges, a ridge-filling base coat used after buffing will create a flawless even surface. Limit frequency: Buff your nails once every two to three weeks at most — over-buffing weakens nails significantly with repeated use.
Step 4: Push Back and Nourish Your Cuticles
Cuticles that are left overgrown or dry will cause polish to lift at the base of the nail within just a few days. Keeping them healthy and tidy is a small step with a big payoff for manicure life.
Soften first: Soak fingers in warm water for a few minutes or apply cuticle softener before pushing anything back gently. Use a cuticle pusher: A rubber-tipped or wooden cuticle stick is safer and gentler than metal tools for everyday nail prep. Never cut aggressively: Trimming cuticles too short breaks the protective seal and opens the door to irritation and bacteria. Apply cuticle oil: Work a small drop of cuticle oil into the base of each nail to nourish and keep the skin flexible and healthy. Why it helps longevity: Lifted cuticle skin catches on polish edges and causes premature peeling starting right at the nail base.
Step 5: Wash and Degrease Every Nail
This step is skipped more often than any other — and it is one of the most critical. Even freshly buffed nails carry natural oils, dust, and product residue that will completely destroy polish adhesion.
Wash with soap: Use a mild soap and warm water to clean hands and nails thoroughly right after filing and buffing them. Dry completely: Pat hands fully dry with a clean towel — any moisture left on the nail will trap humidity under the polish. Wipe with alcohol: Use a lint-free pad or cotton round soaked in rubbing alcohol or nail prep cleanser on each nail individually. Skip the lotion: Do not apply hand cream before polish — oils in moisturizer create a slick barrier that prevents bonding entirely. The result: Clean, degreased nails are the single most effective thing you can do to make polish stick longer and stronger.
Step 6: Apply a Quality Base Coat
A base coat is not optional — it is the foundation of every long-lasting manicure. It acts as a bonding layer between your natural nail and the color, protecting both while dramatically improving wear time.
Choose the right formula: Use a sticky or bonding base coat for regular polish and a proper gel base coat for gel applications. Apply thinly: One thin, even layer is more effective than a thick coat — thick base coats take longer to dry and can cause bubbling. Cap the tip: Drag the brush lightly across the free edge of each nail to seal the tip and prevent early tip-chipping from daily wear. Let it dry fully: Do not rush into applying color — waiting until the base coat is completely dry gives it time to bond properly. Bonus benefit: A good base coat also prevents dark polishes from staining the natural nail plate with pigment over time.
Step 7: Maintain Nail Health Between Manicures
Nail prep does not begin the moment you sit down to paint your nails. It is an ongoing habit. Healthy nails hold polish longer, chip less, and look better from the very first stroke of color.


Moisturize daily: Apply cuticle oil or a nail serum every evening to keep nails hydrated, flexible, and strong between manicures. Protect with gloves: Wear rubber gloves while washing dishes, cleaning with chemicals, or doing any prolonged water-exposure tasks. Avoid using nails as tools: Opening cans, scratching stickers, or prying things with your nails causes micro-cracks and instant chipping. Give nails a break: Take a week off from gel or acrylic treatments every few months to let the natural nail plate recover strength. Eat for nail health: Biotin, zinc, and protein-rich foods strengthen nails from the inside and reduce breakage between polish applications.
Frequently Asked Questions
Why does my nail polish chip so fast even with a base coat? Skipping the degreasing step is the most common reason. Natural nail oils prevent even a quality base coat from bonding properly.
How long should I wait between each prep step before applying polish? After the degreasing step, wait at least one to two minutes before applying base coat to ensure nails are completely dry.
Can I skip buffing if my nails are already smooth? Yes, but a light buff still helps polish grip better. If your nails are ridge-free, one pass with the smoothing side is enough.
Is acetone remover bad for nails before a manicure? Occasional acetone use is fine, but follow it with a thorough wipe-down and let nails air-dry for a few minutes first.
How many coats of base coat should I apply? One thin, even coat is always enough. Two coats can make the base too thick, which slows drying and increases bubbling risk.
Does nail shape really affect how long polish lasts? Yes. Rounded and squoval shapes distribute impact more evenly and resist chipping far better than sharp square or stiletto shapes.
Why Your Manicure Keeps Failing (And How Prep Fixes Everything)
Most polish problems — chipping, lifting, bubbling, peeling — trace directly back to preparation shortcuts. It is not the polish brand, the top coat, or your nail type. It is the foundation. When each prep step is done correctly and in the right order, your manicure has every advantage it needs to last.
Think of nail prep the same way you think about skincare. You would not apply foundation over an unwashed face. The same logic applies here. Clean, shaped, degreased, and base-coated nails give your color somewhere strong to hold on to.
The beautiful thing about mastering nail prep is that it becomes second nature very quickly. After doing it two or three times, the whole process takes under fifteen minutes and the payoff — a manicure that lasts a full week or longer — is absolutely worth it.
The Polish Stays On — Promise
A chip-free manicure is not luck. It is prep. Every single step in this guide exists for a specific reason, and together they create the foundation that makes your color last as long as possible.
Start with clean, shaped nails. Degrease every surface. Use a proper base coat. And take care of your nails in between appointments. Do all of that consistently and your manicure will genuinely surprise you.
Salon-quality results are completely within reach at home. You just have to start at step one.
Your nails deserve that effort — and so does your time, your polish, and every color you love.


