
How to Remove Dip Nails at Home Safely: Step-by-Step Guide That Works
Dip powder nails are brilliant while you are wearing them — chip-resistant, glossy, and genuinely long-lasting. The tricky part comes at removal time. Unlike regular nail polish that wipes off in seconds, dip nails are bonded to your natural nail with a resin system that takes real patience and the right technique to release cleanly. Rushing the process or trying to peel them off is one of the fastest ways to damage your natural nails and create months of recovery work. The good news is that safe, damage-free removal at home is completely achievable when you follow the correct steps.

Below is a complete guide covering everything you need to remove dip nails safely at home — from the tools you need to three proven methods and essential aftercare for your nails.
Why Dip Powder Is So Much Harder to Remove Than Regular Polish
Before you attempt removal, understanding what you are actually dealing with makes the whole process less frustrating and more successful.
How dip bonds: Each dip nail layer uses a cyanoacrylate-based resin that chemically adheres to the nail surface, creating a bond that is far stronger and more resistant than regular nail lacquer.
Why peeling is dangerous: Forcing dip off by peeling or prying does not just remove the dip — it pulls away the top layers of your natural nail plate along with it, leaving nails thin, weak, and damaged.
What breaks the bond: Pure acetone is the only product that reliably dissolves the resin system used in dip nails — diluted nail polish removers do not have enough strength to fully break down dip powder layers.
Knowing this upfront sets the right expectation: dip removal is not a five-minute task. It requires acetone, soaking time, and patient technique — but when done correctly, your natural nails come through the process completely intact.
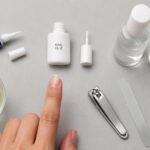
Everything You Need to Gather Before You Start
Having all your supplies within reach before you begin makes the entire removal process faster, cleaner, and far less likely to go wrong halfway through.
Acetone requirement: Use 100% pure acetone only — not regular nail polish remover, not acetone-based remover blends, and not gel remover formulas, which are different products.
Wrapping supplies: Aluminum foil cut into small squares or reusable silicone soak-off clips both work for keeping acetone-soaked cotton pressed firmly against each nail.
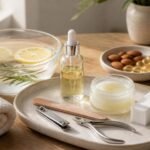
Protection and aftercare: Gather petroleum jelly or thick cuticle cream, a nail file, a soft buffer, an orangewood stick or cuticle pusher, cuticle oil, and a nourishing hand cream before you start.
Laying everything out in advance means you will not be hunting for the foil with acetone-soaked cotton falling off your fingers. A five-minute setup saves real frustration during the actual removal process.
Method 1: The Foil Soak-Off Technique (Most Recommended)
The foil wrap method is the gold standard for at-home dip removal because it keeps pure acetone in direct, sustained contact with each nail throughout the soaking period.
Step one — file the surface: Use a medium-grit nail file to buff away the shiny top coat layer on every nail. This breaks the sealed surface and lets acetone reach the dip layers underneath far more quickly.
Step two — protect your skin: Apply a thin layer of petroleum jelly around each nail on the skin and cuticle area before any acetone contact — this prevents the drying and irritation that prolonged acetone exposure causes.
Step three — wrap and wait: Soak cotton pads in acetone, press one firmly onto each nail, wrap each finger tightly in a small square of aluminum foil, and leave everything undisturbed for 15 to 20 minutes minimum.
After the soaking time, unwrap one finger to check progress. The dip should appear visibly softened and will slide away easily under light pressure from an orangewood stick. If any areas resist, rewrap and soak for an additional five to ten minutes rather than scraping or forcing anything.
Method 2: The Acetone Bowl Soak
For people who find the foil wrap fiddly or frustrating, soaking fingertips directly in a bowl of acetone is a simpler and equally effective alternative.
Bowl setup: Pour enough 100% pure acetone into a small glass or ceramic bowl to cover your fingertips completely — avoid plastic bowls since acetone can warp or dissolve some plastic materials.
Heat hack: Place your acetone bowl inside a second larger bowl filled with warm water. The gentle warmth speeds up the chemical breakdown process noticeably without any risk of overheating.
Skin protection: Apply petroleum jelly generously to the skin around your nails and on your fingers before submerging them — extended acetone contact dries skin significantly without this protective barrier in place.
Soak for 15 to 20 minutes, checking one nail periodically. Once the dip softens and lifts at the edges, use an orangewood stick to gently push the loosened material off the nail surface with minimal pressure. Never scrape at areas that still feel firmly attached.
Method 3: Professional Salon Removal
When home removal feels like too much of a time commitment or if your dip layers are particularly thick after multiple fill applications, professional removal is a completely valid option.
E-file advantage: Nail technicians use electric files to remove the bulk of the dip material quickly and precisely before any acetone contact, which dramatically reduces total removal time compared to home soaking alone.
Who benefits most: Anyone with very thick dip applications, multiple layers built up over several fill appointments, or sensitive natural nails that react poorly to extended acetone exposure should seriously consider the professional route.
Cost perspective: A professional dip removal typically costs between ten and twenty dollars at most nail salons — a small investment for preserving nail health if you have any concern about safely completing the process at home.
Professional removal is not a sign of failure — it is a smart choice when the situation genuinely calls for it. The goal is always protecting your natural nails, and sometimes that means letting a trained technician handle the process.

Mistakes That Damage Your Nails During Dip Removal
These are the errors that turn a simple removal into weeks of nail recovery — knowing them in advance keeps your nails healthy through every removal.
Peeling and prying: This is the single most damaging thing you can do to your nails. Dip resin tears away the top layers of your actual nail plate when forced off, leaving nails thin, ridged, and painfully weak for months afterward.
Skipping the filing step: Attempting to soak through the sealed top coat without filing it first makes your removal take twice as long and forces you to leave your fingers wrapped in acetone far longer than necessary.
Using the wrong remover: Regular nail polish remover, even acetone-based blends, does not contain enough pure acetone to properly dissolve the dip resin system — using it just dries out your skin with zero removal progress.
Rushing the soak time: Checking your nails too early and trying to push off dip that has not fully softened is how micro-damage to the nail plate happens — patience during the soak period is non-negotiable for safe removal.
Every single one of these mistakes is easy to avoid when you know what to look out for. Take your time, follow the steps, and your nails will thank you immediately after removal.
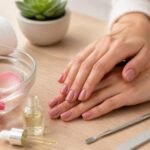
Nail Aftercare That Matters After Dip Removal
Removing dip nails is only half the process — what you do immediately after removal determines how quickly your natural nails recover and how healthy they look and feel going forward.
Surface smoothing: Use a soft buffer to gently smooth any uneven texture or ridges on the nail surface after removal — avoid aggressive filing which adds unnecessary stress to already-compromised nails.
Cuticle oil application: Massage cuticle oil into every nail bed and surrounding skin immediately after removal and then daily for at least one week — acetone strips moisture from both nails and skin and regular oil application accelerates recovery.
Strengthening treatment: Apply a nail strengthening base coat or treatment polish to bare nails in the days following removal to support rebuilding nail integrity before your next manicure application.
Rest period: Giving your natural nails even one full week between dip removal and the next dip application makes a meaningful difference in long-term nail strength — regular rest periods prevent the cumulative thinning that builds up over consecutive dip applications without breaks.
Aftercare is not an optional bonus step — it is an essential part of the full dip nail cycle that protects your nail health across every future manicure you do.
FAQs About Removing Dip Nails at Home
Can I remove dip nails without acetone? Pure acetone is the only reliably effective product for dissolving dip powder resin at home. Non-acetone removers do not break down the bonding system and may leave you soaking for an hour with minimal progress.
How long should I soak dip nails in acetone? Most dip manicures release cleanly after 15 to 20 minutes of soaking. Thicker or older applications may need up to 30 minutes — always re-soak rather than force any material that still feels firm.
Does removing dip nails damage natural nails? The removal process itself does not damage nails when done correctly. Damage happens almost exclusively from peeling, scraping, or forcing dip off before the acetone has fully softened the resin.
Can I reuse the foil wraps for dip removal? Yes — if you are using silicone soak-off clips rather than foil, they can be rinsed with acetone and reused repeatedly. Standard aluminum foil should be discarded after each use for hygiene reasons.
How often can I safely get dip nails? Most nail care professionals recommend taking a one-week break between dip manicures every two to three applications to allow natural nails to breathe, recover moisture, and rebuild surface strength.
Is the bowl soak method as effective as the foil method? Both methods work equally well when given adequate soaking time. The foil method keeps acetone more concentrated against each nail, which can speed things up slightly — but the bowl method is simpler and produces the same clean result with a few extra minutes.
What Your Nails Are Telling You After Every Removal
Your natural nails are surprisingly good at communicating their condition if you pay attention after each dip removal. Nails that look slightly opaque, feel flexible rather than firm, or show visible ridges across the surface are signaling that they need more recovery time and intensive moisture before the next application.
Healthy dip nail cycling means removal, a proper rest period with daily cuticle oil, and ideally a strengthening treatment between applications. This routine is what allows people to wear dip nails consistently for years without significant long-term nail damage.
The way your nails look and feel three days after removal is a reliable indicator of whether you are ready for the next application or whether a longer recovery window would serve your nails better. Listening to those signals is what separates nail enthusiasts with consistently beautiful, strong nails from those who struggle with thinning and breakage over time.
Handle With Care
Dip nail removal done right is genuinely one of those nail care skills that pays dividends every single time you apply a new set. Understanding the process, gathering the right tools, choosing the method that suits your lifestyle, and committing to proper aftercare turns what feels like a chore into a manageable part of your regular nail routine.
Your natural nails are the foundation of every beautiful manicure you will ever wear. Treating the removal process with the same care and attention you give the application is how you protect that foundation for the long term.
Take your time, skip the shortcuts, and apply the cuticle oil consistently after every single removal. Those small habits add up to nails that stay strong, healthy, and ready for your next gorgeous dip manicure whenever you are ready to go again.
how to remove dip nails at home, dip powder nail removal, remove dip nails safely, dip nail removal guide, acetone nail soak


