
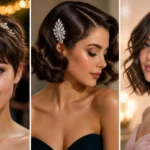
16 Beanie Hairstyles for Women That Actually Look Good All Day
Beanies solve the cold weather problem but create a hair problem. Flat roots, stressed edges, and that telltale hat head when you finally step indoors — none of it is a great look. The good news is that a little planning before you leave the house changes everything.

The styles that hold up best under a beanie are the ones that work with the pressure rather than against it. Low placements, defined textures, and anything that keeps the hair contained and smooth are your best friends here.
One thing worth doing before anything else: line your beanie with satin fabric or slip a thin satin scarf underneath. It dramatically reduces friction, cuts frizz, and keeps your edges from taking the hit all day.
The other rule is placement. Do not drag the beanie down tight over your hairline. Keep it sitting slightly higher so the front of your hair stays relaxed and breathing.
Below are 16 beanie hairstyles for women that look genuinely good — warm enough for winter, cute enough for everything else.
1. Cozy Low Braid
A single low braid is one of the most practical beanie hairstyles you can wear. It keeps the hair flat and smooth under the hat, prevents that awkward bump at the back of the crown, and looks intentional rather than like you ran out of time.
The braid can be as tight or as relaxed as you prefer. A looser plait has a more casual, lived-in quality that suits a chunky knit beanie beautifully.
Start the braid at the nape: Beginning the braid low rather than mid-back keeps it flat under the hat and avoids any unwanted bulk at the crown.
Leave a few face-framing pieces loose: Pulling out a strand or two beside the face softens the look and prevents the style from reading as too pulled-back or severe.
Use a fabric hair tie at the end: A satin-covered elastic rather than a rubber band protects the braid tip from breakage, especially during cold, dry winter months.
Refresh by re-loosening the plait: If the braid feels tight after a day under the beanie, gently tugging the sections apart adds softness and gives it a fresh, relaxed finish.
2. Soft Curly Beanie Halo
This look is about using the beanie as a frame rather than a cover. Worn further back on the head, the hat acts like a headband — keeping the crown area contained while the curls spill freely around the face and sides.
It is a style that actually gets better with a beanie. The hat gives the curls a structured backdrop that makes the natural volume and definition pop even more than they would without it.
Position the beanie at least two inches from the hairline: This protects the edges from continuous pressure and lets your curls frame the face naturally without restriction.
Apply curl cream before the beanie goes on: Defining the curls with a light cream before putting on the hat means they hold their shape better when you take it off later.
Scrunch rather than smooth: Scrunching the curls upward rather than pressing them down maintains the spring and prevents the halo shape from collapsing through the day.
Avoid putting the beanie on wet hair: Damp curls under a hat create the ideal conditions for frizz — wait until curls are fully set and dry before styling with a beanie.
3. Box Braids Under a Beanie
Box braids and beanies are genuinely one of the best winter combinations. The braids are already structured, protected, and low maintenance — the beanie just adds warmth without disrupting any of that.
The key is how you position everything. Bringing the braids forward over the shoulders and sliding the beanie over the back of the head keeps the front-facing portions visible and face-framing.
Pull braids forward before putting on the hat: Wearing the length in front rather than tucked back keeps the beanie sitting smoothly and shows off the braids beautifully.
Mist the scalp lightly before styling: A quick spritz of water or a braid refresher spray hydrates the scalp underneath and prevents the dryness that wearing hats all day can cause.
Seal edges with a light edge oil at night: Box braids under a beanie can dry out the hairline — a small amount of edge oil applied nightly keeps the hairline healthy and moisturized.
Use a satin-lined beanie for the best result: A satin lining prevents the beanie from gripping the braids and causing frizz at the parting lines over long periods of wear.
4. Long Knotless Braids, Front Out
Knotless braids start with your natural hair and gradually add extensions, which means the root tension is significantly gentler than traditional box braids. That gentle start makes them even better under a beanie — there is no tight base pressing against the hat all day.
Wearing the long lengths forward is both practical and stylish. The beanie sits flat against the back of the head while the braids cascade down the front, creating a look that is bold and effortless simultaneously.
Choose a slimmer beanie for this style: A thin ribbed beanie sits more smoothly over knotless braids than a chunky knit, which can add unwanted bulk at the back of the head.
Keep a few braids shorter at the front for face framing: Intentionally placing a couple of shorter braids at the front hairline creates a structured frame that draws attention to the face.
Avoid securing all braids under the hat: Tucking everything underneath defeats the visual impact — let the length sit in front where it can be seen and appreciated.
Moisturize ends weekly during winter: Cold, dry air is hard on braid ends — a weekly application of a light hair butter keeps them from becoming brittle or frayed.
5. Side Braid and Chunky Knit
A side braid paired with a chunky knit beanie is a winter style combination that works because the two elements complement each other in both practicality and aesthetic. The braid sweeps the hair away from the neck and coat collar, while the oversized beanie adds a cozy, editorial quality to the whole look.
The side placement also does something subtle but important — it leaves more of the face visible and open, which prevents the beanie and the hairstyle from competing with each other.
Start the braid just behind the ear: Beginning the plait at ear level rather than higher ensures the beanie does not press directly on the braid’s starting point and cause pressure or discomfort.
Keep the tension deliberately loose near the root: A relaxed braid at the top looks naturally beautiful and prevents any tightness at the hairline where the beanie meets the hair.
Drape the braid over one shoulder: Bringing the finished braid forward over the shoulder rather than letting it hang behind prevents it from bunching under the coat collar all day.
A textured braid suits this look perfectly: A slightly messy, pulled-out Dutch or fishtail braid has a casual, effortless quality that pairs beautifully with the texture of a chunky knit hat.
6. Double Braids, Sporty and Warm
Two braids are the most contained and practical option when you need to wear a beanie for an extended period. Everything stays in place, the hair is fully protected from the cold air and friction, and the style looks energetic and intentional rather than hastily thrown together.
Whether you go classic three-strand, Dutch, or simple twists, double braids fit neatly under any beanie style and hold their shape reliably all day long.
Part cleanly down the center before braiding: A sharp center part makes double braids look deliberate and polished rather than accidental — take thirty seconds to get the line straight.
Apply a leave-in conditioner through the lengths first: Working a lightweight leave-in through the hair before braiding keeps the strands moisturized throughout the day under the hat.
Secure the tips with small elastics: Using matching elastics at both braid ends keeps them even and prevents one side from unraveling before the other through daily movement.
Bring both braids forward for a collegiate look: Wearing the double braids draped in front rather than behind the shoulders gives this style a youthful, styled-with-intention quality.
7. Beanie with Defined Curls Out
Letting curls hang freely beneath a beanie is one of the most effortlessly stylish approaches to winter hair. The hat sits at the back and top of the head, the curls frame and fill the sides, and the overall effect is voluminous and beautiful.
The technique here is in the order of operations. Define the curls first, let them dry completely, and then add the beanie — never the other way around. Wet curls under a hat are the fastest path to frizz and lost definition.
Wear the beanie tilted slightly back: A hat that sits naturally toward the back of the head rather than pulled forward preserves the most curl volume and keeps the front hairline relaxed.
Refresh with water and mousse on second-day curls: A light mist of water followed by a scrunch of mousse reactivates defined curls before the beanie goes on, giving them the best chance of holding their shape.
Avoid touching the curls once defined: Finger combing or adjusting defined curls after they are set breaks up the clumps and introduces frizz — set them and leave them.
A lightweight beanie works better than a heavy knit here: Heavier beanies can compress the curls at the crown — a thinner, softer hat allows more natural lift and volume to remain.
8. Sleek Straight Hair with a Minimal Beanie
Straight hair under a beanie looks its best when the hat is understated and the hair does the talking. A thin ribbed beanie worn slightly back on the head lets the sleekness of the straightened hair remain visible while adding warmth without bulk.
The main challenge with straight hair and beanies is static. Cold weather and knit fabric are a recipe for flyaways — a small amount of the right product makes all the difference.
Use a light anti-static serum on the top layer: Running a pea-sized amount of serum over the surface hair before putting on the beanie prevents static and keeps everything lying flat.
Keep the ends tucked behind the shoulders: Straight hair that falls behind the shoulders rather than over the coat collar avoids creasing and maintains the clean, polished line of the style.
Avoid pulling the hat too low over the front: A beanie that sits high enough to leave the hairline visible looks far more intentional and styled than one dragged down to the brows.
A silk or satin hair wrap before the beanie adds another layer of protection: For those who straighten their hair and want it to last multiple days under a hat, a thin satin wrap between the hair and the beanie prevents friction significantly.
9. Blunt Bob Under a Beanie
A blunt bob is one of the cleanest, most graphic haircuts available — and it happens to look excellent with a beanie. The precision of the cut means even a little compression from the hat does not truly disrupt the overall shape.
The secret to making this combination work is in the positioning. Keeping the hat tilted slightly back rather than pulled forward preserves the bob’s line and keeps the face open and framed by the cut.
Position the beanie behind the bob’s parting line: Wearing the hat back from the natural part lets the bob’s shape sit visibly beneath the hat’s brim rather than disappearing under it.
One pass with a flat iron on the ends is enough: Running a flat iron lightly over the bob’s ends before putting on the hat takes two minutes and ensures the shape stays crisp and intentional all day.


Choose a beanie that matches the bob’s energy: A sharp, clean bob pairs best with a fitted ribbed beanie rather than a slouchy or oversized style, which can overwhelm the cut’s precision.
A little shine spray on the surface completes the look: A light shine spray over the top of the bob before the beanie goes on keeps the finish polished and the hair looking deliberately styled.
10. Short Pixie, Easy Beanie Style
A pixie cut is arguably the most beanie-friendly haircut you can have. There is very little hair to manage, no length to get crushed or tangled, and the hat slides on and off without disrupting the overall structure of the style.
The one thing to watch is the front. Letting a little fringe or texture show at the forehead prevents the beanie from making the pixie look completely hidden and gives the whole combination a more deliberate, finished quality.
Leave the front fringe slightly exposed: Positioning the beanie far enough back to let the forehead fringe peek out keeps the face open and the style visible rather than entirely covered.
Work a small amount of styling paste through before the hat goes on: A pea-sized amount of matte paste through the top sections of a pixie keeps the texture defined and prevents the hat from completely flattening the crown.
Push the sides down gently with a soft brush: Using a soft paddle brush to smooth the sides of a pixie before the beanie goes on creates a neat, intentional foundation for the hat to sit on.
A textured pixie handles beanie wear better than a sleek one: A cut with built-in texture bounces back more easily after hat removal than a highly polished, smoothed pixie style.
11. Defined Curls Under a Soft Beanie
This is a slightly different approach to wearing curls with a beanie compared to the full-out halo version. Here, the hat sits with more coverage while the curls frame the face at the sides and front — a more contained look that still showcases the curl definition beautifully.
The soft beanie — a looser, more relaxed knit rather than a fitted ribbed style — is important here. It sits on top of the curls without pressing them flat, which preserves the shape through hours of wear.
Let curls dry fully before adding the beanie: Fully set, dry curls hold their shape under a hat far better than damp curls, which will frizz and lose definition as they finish drying under the fabric.
Scrunch mousse through damp hair, then air dry: Mousse gives curls hold without stiffness — air drying rather than diffusing before the beanie goes on means the curls are thoroughly set when the hat is added.
Keep the beanie slightly back from the crown: Even a centimeter of extra space between the hat and the top curls reduces the compression on the crown and preserves more natural volume.
Finger comb gently to refresh after hat removal: When the beanie comes off, gently separating any compressed curls with dry fingers rather than a brush restores shape without creating frizz.
12. Slouchy Beanie Low Ponytail
The low ponytail is a genuinely reliable beanie hairstyle because the mechanics simply work. The ponytail sits at or just below the nape, the beanie rests comfortably above it, and nothing is fighting for space or creating pressure at an awkward spot.
A slouchy beanie in particular suits this combination well. The relaxed drape of the hat’s excess fabric at the back complements the casual simplicity of the low ponytail without overshadowing it.
Smooth the top before securing the ponytail: A quick pass of a wide-tooth comb or soft brush through the top section ensures the ponytail sits flat under the beanie rather than creating crown bumps.
Wrap a strand of hair around the elastic: Taking a small section of the ponytail and wrapping it over the band hides the elastic and immediately elevates the look from functional to intentional.
Leave two face-framing pieces out at the front: Letting a strand or two fall beside the face softens the pulled-back effect and prevents the combination from reading as too utilitarian.
This works beautifully on second or third-day hair: A low ponytail is one of the best uses for hair that is not freshly washed — the natural texture actually gives the style more grip and character.
13. Messy Low Bun with Soft Fringe
A messy low bun is the perfect balance between effort and ease. It looks like you spent time on your hair without requiring you to actually spend much time at all — which, in the context of a cold morning and a hat you are about to put on anyway, is exactly right.
The soft fringe pieces around the face and ears are what elevate it from just a bun into a genuine style. They give the look a feminine, relaxed quality that the beanie then frames rather than conceals.
Twist hair loosely at the nape rather than gathering it tightly: A twisted bun rather than a scraped-back one has natural softness and body that survives hat wear and looks beautiful when the beanie comes off.
Pin with a few bobby pins rather than a tight elastic: Pinning the bun loosely in place rather than securing it with a tight band avoids the telltale dent at the base of the bun when the hat is removed.
Pull a few wisps free around the ears after pinning: Deliberately releasing small pieces at the temples and ears after the bun is pinned creates the soft framing that makes this style feel intentional.
The messier, the better under a beanie: A perfectly smooth bun looks out of place under a casual winter hat — embrace the texture and let the pieces fall as they want to.
14. Short Curly Bob with Beanie Bangs
A curly bob already has a rounded, compact shape that sits wonderfully under a beanie. When there are bangs involved, positioning becomes everything — the hat pushed back just enough to let the fringe rest naturally over the forehead is the only adjustment needed.
The curly texture means the bob springs back after hat removal with minimal intervention. A light spritz of water and a quick scrunch is usually all it takes to restore the shape.
Push the beanie back to fully expose the bangs: Covering the bangs defeats their purpose — wear the hat far enough back so the fringe rests naturally on the forehead without compression.
Define the bob curls with a gel-mousse hybrid: A gel-mousse combination gives curly bobs the hold they need to survive a day under a hat while still feeling soft and natural rather than crunchy.
Mist with water and scrunch after hat removal: When the beanie comes off, a quick spritz and scrunch through the curls restores any compressed sections and refreshes the entire shape in under a minute.
A snug ribbed beanie suits a curly bob better than a slouchy one: Too much excess fabric at the back of a slouchy beanie can push down on a short curly bob and flatten it — a more fitted hat gives the curls space to retain their shape.
15. Shoulder-Length Curls with Side Tuck
Shoulder-length curls tucked to one side under a ribbed beanie create a relaxed asymmetry that looks effortlessly stylish. One side shows volume and movement, the other stays tucked — it is a small detail that makes a big visual difference.
The off-center part is part of what makes this work. A slightly asymmetric part combined with the side tuck gives the whole look a casual, natural quality that suits winter dressing perfectly.
Flip your part slightly off center before putting the hat on: A part positioned one inch away from center immediately adds volume and an asymmetric quality that makes the side tuck look intentional.
Tuck one side behind the ear rather than pinning it: A simple behind-the-ear tuck is easier to maintain through a day of hat on and off than a pinned style that loses its placement with movement.
Apply a light oil to the ends before going out: Winter air is particularly drying on shoulder-length ends — a small amount of hair oil on the tips before putting the beanie on provides a protective barrier throughout the day.
Let the volume sit on the non-tucked side: Keeping the fuller side of the curls loose and on one side while the other is tucked creates a beautiful asymmetric balance that photographs extremely well.
16. Wispy Fringe and Cozy Shag
A shag cut is already designed for texture and movement — it is layers upon layers of intentional softness that a beanie cannot really flatten because there is no single, smooth surface to disrupt. The wispy fringe in front is the style’s focal point, and keeping the hat back enough to preserve it is the only real consideration.
The cozy shag and beanie combination has a very specific energy — effortless, slightly undone, and completely at ease with itself. It is the winter equivalent of waking up with great hair.
Blow-dry the fringe for thirty seconds before adding the beanie: A brief blast of warm air directed at the bangs followed by a finger comb sets the fringe in a soft, natural position that holds under the hat.
Wear the hat tilted back at a slight angle: A beanie that sits a little to the back and slightly tilted gives the wispy fringe full visibility and gives the whole look a casual, artful quality.
Use a texturizing spray through the shag layers: A light texturizing spray through the mid-lengths before the hat goes on enhances the layered movement and prevents the shag from looking compressed when the beanie comes off.
Finger-style the shag after hat removal: Shag cuts respond better to finger-styling than to brush-styling — running hands through the layers after the beanie comes off restores the texture beautifully in thirty seconds.
Frequently Asked Questions
How do I stop a beanie from giving me hat head? The main cause of hat head is the hat sitting too tight against flat hair. Wearing styles with built-in volume or texture at the crown — loose buns, defined curls, or a side braid — means there is something for the hat to rest on rather than compress. Positioning the beanie slightly higher on the head also helps significantly. Finishing with a quick scrunch or finger comb once the hat is removed restores most styles in seconds.
What is the best hairstyle to wear under a beanie all day? Low styles are the most reliable for all-day wear. A low ponytail, low braid, or low twisted bun sits at or below the nape and allows the beanie to sit smoothly without shifting or creating pressure at the crown. For natural hair, braids or twists are the most comfortable and protective option for extended hat wear.
How do I protect my edges when wearing a beanie every day? Keep the hat from sitting directly on the hairline as much as possible — position it slightly further back. If your beanie has a rough interior, sewing in a satin lining or wearing a thin satin band over the hairline before the hat provides a friction barrier that makes a real difference. Avoid wearing very tight hairstyles under the hat at the same time, as combined tension from the style and the hat accelerates hairline stress.
Can I wear my natural curls under a beanie without ruining them? Yes — the key is timing and dryness. Curls that are fully dry and well-defined before the beanie goes on hold their shape far better than damp or freshly scrunched curls. Use a mousse or curl cream, let the curls air-dry completely, and then add the hat. A satin-lined beanie reduces friction dramatically and helps curls survive a full day of hat wear with minimal frizz.
Does a beanie cause hair breakage over time? It can, especially if the beanie’s interior fabric is rough and the hat is worn tightly against the hairline every day. The friction from a coarse interior knit rubbing on fine edge hairs is a common cause of gradual hairline breakage. Switching to a satin-lined beanie, loosening the positioning, and keeping the hairline moisturized with a light oil resolves most of this problem entirely.
What kind of beanie is best for hair health? A satin-lined beanie is the gold standard for hair health. If that is not available, a smooth silk bonnet worn underneath any beanie achieves the same result. Among unlined options, looser, softer knits cause less friction than tightly woven, rough ones. Avoid beanie styles with rough interior labels at the neckline, as these can create friction exactly where delicate edge hair sits.
Why Beanie Hair Requires a Strategy, Not Just a Style
The reason most beanie hair looks fall flat — literally — is that they are chosen after the hat goes on rather than before. Styling your hair with the beanie already in mind changes the outcome completely. It shifts the thinking from what your hair looks like at home to what it will look like after a full day of hat wear, and those are genuinely two different answers.
The other piece most guides skip is the hat itself. The interior fabric of a beanie is a major variable in how your hair holds up. A rough acrylic knit against fine hair for eight hours is going to cause friction, static, and edge stress regardless of how well the hair was styled underneath. Upgrading the lining is a fifteen-minute DIY sewing project that changes everything about the daily beanie experience.
Cold weather hair care is not complicated — it is just about being intentional at the right moment. The two minutes you spend on your hair before the hat goes on is worth more than twenty minutes trying to fix things after.
Hat Day, Won
The beanie does not have to be the enemy of your hair. It just has to be worn with a little more thought than you might give a summer accessory.
Pick one or two styles from this list that match your hair texture and daily routine. Practice them a couple of times so they take no effort, and keep a small refresh kit in your bag — a travel spray bottle, a tiny amount of mousse, and maybe an edge brush.
After that, the beanie becomes exactly what it was always supposed to be: a warm, stylish accessory that completes the look rather than complicating it.


 6")
