
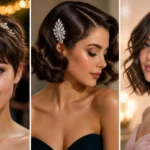
21 Gorgeous Hairstyles with Red Highlights for Black Girls That Pop Every Time
Red highlights on dark hair create one of the most striking, head-turning color combinations possible.

The contrast between deep black or dark brown hair and vibrant red tones is bold, warm, and endlessly flattering on a wide range of skin tones.
What makes red highlights especially appealing is the flexibility — you can go barely-there with thin ribbons or fully commit with a bold face-framing money piece.
The look works beautifully on natural curls, silk presses, braids, twists, and everything in between.
The single most important thing to get right before you choose your style is placement — well-placed red looks expensive and intentional, while random placement can look scattered. Below are 21 hairstyles with red highlights for Black girls, chosen for their stunning contrast, creative placement, and real-life wearability.
1. Soft Layered Ribbons
Long layered hair with thin red ribbons woven through is one of the most elegant ways to introduce color to dark natural hair.
The ribbons sit subtly within the layers, revealing themselves as a warm, glowing surprise whenever the hair moves or catches the light.
The overall look stays dark and rich while the red adds just the right amount of depth and dimension.
Ribbon tip: Ask for red highlights placed closest to the face and through the ends — these positions catch the most light and have the biggest visual impact. Layer tip: Soft, face-framing layers help the red ribbons fall forward naturally, making them more visible from the front. Gloss tip: A red-tinted or clear color gloss every 3–4 weeks keeps the ribbon highlights looking rich and freshly done. Spacing tip: Evenly spaced thin ribbons look far more natural and intentional than random or clustered placement. Care tip: Use a sulfate-free shampoo and cool water rinses to slow the fading process and keep the red vibrant longer.
2. Cherry Cola Curly Balayage
Cherry cola balayage on natural curls is one of the most beautiful, dimensional color results for Black girls with darker hair.
The deep, wine-tinted red is blended softly through the outer curl pattern, creating a sun-kissed effect that reads warm and glowing rather than harsh or obvious.
The dark base stays dominant throughout, making this a color that enhances natural beauty without overpowering it.
Cherry tip: Request a cherry cola tone that leans more red-brown than pure red — it blends most naturally with dark black or brown bases. Outer tip: Ask for the balayage to be concentrated on the outer curls and top layers where light hits first for the most natural sun-kissed finish. Diffuse tip: Diffuse on low heat after defining with mousse and a light gel — this preserves the curl pattern and enhances the color’s natural glow. Tone tip: A red-brown toner applied over the lightened sections pulls the shade into a truer cherry cola rather than a brassy orange. Shine tip: A lightweight curl serum scrunched through the ends after drying makes the cherry cola highlights appear vivid and glossy.
3. Red Money Piece Waves
A bold red money piece on dark wavy hair is a statement that speaks for itself — the bright color at the very front of the face creates instant drama and personality.
The two bright sections frame the face perfectly while the rest of the hair stays deep and dark, creating a high-contrast look that balances itself beautifully.
Waves soften the overall effect and give the red pieces movement and life.
Money piece tip: Keep the red money piece panels no wider than one inch on each side — narrower sections look sharper and more modern. Contrast tip: The darker the rest of the hair, the more vivid and impactful the red money piece appears — avoid lightening the base. Wave tip: A curl cream plus heat protectant applied before waving creates smooth, defined bends that show off the money piece at its best. Part tip: A deep side part draws the red money piece forward toward the face, maximizing its face-framing and brightening effect. Toner tip: A true red toner — not orange-red or burgundy — gives the most striking, vivid money piece contrast against dark hair.
4. Curly Puff with Red Tendrils
A high curly puff is a classic protective style, but red tendrils framing the face transform it from everyday to effortlessly styled.
The red pieces curl softly forward at the temples and hairline, adding warmth and personality to what is otherwise a simple, pulled-back look.
It is the kind of small color detail that makes a big difference in how put-together and intentional the overall style feels.
Puff tip: Let the tendrils air-dry naturally after applying a curl-defining cream so they form tight, glossy ringlets around the face. Red tip: A bright, warm red rather than a deep burgundy reads best against dark skin tones on short, face-framing tendrils. Hydration tip: Consistently moisturized hair means the red tendrils look glossy and defined rather than dry and dull — prioritize daily hydration. Edge tip: Use a light-hold edge control to keep the hairline smooth and neat without flattening the natural curl pattern of the tendrils. Scarf tip: Wrap with a satin scarf each night to preserve both the shape of the puff and the definition of the red tendrils.
5. Feed-In Ponytail with Red Length
Feed-in cornrows that build into a sleek high ponytail are already one of the cleanest, most polished protective styles — adding red through the ponytail length makes the whole look feel custom and intentional.
The red runs through the flowing length of the ponytail, becoming more visible as the hair moves and swings.
It is a sporty, versatile style that works equally well for school, weekends, and dressed-up occasions.
Part tip: Ask for clean, even parts in the cornrow section — precise parts make the base of the ponytail look professionally done. Red tip: Threading red extensions through the ponytail length rather than dyeing it protects your natural hair while still delivering a bold color effect. Tension tip: Request not-too-tight braiding at the roots — excessive tension causes breakage and scalp stress over time. Scalp tip: Apply a lightweight scalp oil every 2–3 days to prevent dryness and flaking while the cornrows are in place. Finish tip: Dip the ponytail ends in hot water to seal and smooth them for the cleanest, most polished finish.
6. Fulani Braids with Red Accents
Fulani braids are already one of the most photographed and celebrated braid styles — and adding red accent braids through the pattern elevates them even further.
The warm red pieces woven into the front and side sections frame the face in the most flattering way, drawing attention to the cheekbones and eyes.
The contrast between the dark braids and the red accents is striking in photos and just as beautiful in person.
Accent tip: Place the red accent braids closest to the face — at the center section and the two front cornrows — for the most flattering facial framing. Weight tip: Keep the braids lightweight overall so the red accents stand out rather than getting lost in a heavy, dense set. Itch tip: Apply a diluted tea tree oil spray along the parts every few days to relieve scalp itching without disturbing the braids. Seal tip: Dip the ends in hot water and seal them cleanly so no loose fiber detracts from the crispness of the red accent placement. Length tip: Mid-back length Fulani braids give the red accents the most room to show off their color as the braids move and swing.
7. Goddess Faux Locs with Burgundy Strands
Goddess faux locs have a soft, slightly undone texture that makes them feel lived-in and natural — and burgundy strands woven throughout add depth and warmth without any harsh contrast.
The burgundy tone is close enough to dark brown to look organic, but rich enough to catch the light in a way that plain black locs cannot.
It is a protective style that delivers both beauty and practicality in equal measure.
Burgundy tip: Choose a burgundy that is slightly red-toned rather than purely purple — it reads warmer and more natural against dark black locs. Scatter tip: Distribute the burgundy strands evenly throughout the locs rather than clustering them in one section for the most organic result. Scalp tip: Moisturize the scalp daily with a lightweight spray — goddess locs can sit for 6–8 weeks, so consistent scalp care is essential. Night tip: Wrap the locs loosely in a satin scarf each night to reduce frizz and keep the goddess texture looking fresh for longer. Length tip: Shoulder-to-mid-back length goddess locs give the burgundy strands the most visual range and movement.
8. Side-Swept Knotless Box Braids
Knotless box braids are already one of the most comfortable and natural-looking protective styles — when thin red highlights are added to select braids, the result feels completely custom and unique.
The side sweep creates a face-framing shape that makes the color placement near the front even more noticeable and flattering.
The red pops just enough without turning the entire style into an all-over color statement.
Knotless tip: Knotless braids with color additions sit flatter at the roots than knotted styles — the result looks more natural and feels lighter to wear. Side tip: Sweeping the braids to one shoulder reveals the color placement and creates a relaxed, editorial shape around the face. Part tip: Small-to-medium box parts give the cleanest finish and allow the red highlights to be placed most precisely. Seal tip: Dip the ends in hot water immediately after braiding for a smooth, sealed finish that prevents fraying around the red sections. Refresh tip: A light braid mousse applied from mid-shaft to ends every few days keeps both the dark and red sections looking smooth and neat.
9. Knotless Box Braids with Red Pops
This version of knotless box braids uses red in a more scattered, selective way — only a handful of braids throughout the set carry the color, making it feel like a surprise detail rather than a planned highlight.
The majority of the braids stay in their deep, rich dark base, which makes the red pops appear even more vivid by contrast.
It is bold enough to be noticed but restrained enough to wear comfortably every single day.
Pop tip: Ask your braider to distribute the red braids randomly rather than symmetrically — scattered placement looks more natural and intentional. Ratio tip: A 4:1 ratio of dark to red braids creates the perfect balance — enough red to pop without overwhelming the dark base. Even tip: Ensure the red braids are placed throughout the entire head rather than concentrated in one area so the color reads as designed. Mousse tip: A light styling mousse applied through the set every few days keeps all braids — dark and red — looking smooth and consistent. Bold tip: Choose a vivid, fire-engine red rather than a dark burgundy for this style — the contrast against the dark base is what makes the pops so striking.
10. Lemonade Side Braids with Red Streaks
Lemonade-style side braids are one of the most architecturally beautiful braid styles available — the curved, stacked pattern running from the front to the back is visually stunning even before color is added.
Red streaks woven through the curved braids follow the direction of the pattern perfectly, making the color feel like a natural extension of the braid design.
The result looks intentional and highly crafted, like every element was planned to work together.
Curve tip: Ask for the red streaks to follow the exact curve of each lemonade braid rather than running straight — it makes the color look built into the design. Placement tip: Concentrating the red through the upper and middle layers of the stacked braids makes it most visible from the front and side. Edge tip: Apply edge control lightly along the hairline and tie down with a scarf for 10–15 minutes after finishing so the edges set clean and flat. Part tip: Clean, precise parts in lemonade braids are essential — uneven parts draw attention away from the beautiful red streak placement. Length tip: Lemonade braids that fall past the shoulder give the red streaks the most length and movement to show off their color.
11. Passion Twists with Burgundy Threads
Passion twists are beloved for their soft, bohemian texture — and burgundy threads twisted into select sections add a warm, richly colored dimension that feels elevated and fashion-forward.
The burgundy doesn’t compete with the style — it enhances it, adding warmth and visual interest that makes the twists look more complex and carefully chosen.
It is a style that photographs beautifully and holds up well over weeks of wear.
Thread tip: Keep the burgundy threads evenly scattered rather than grouping them all in the front — this distributes the color interest throughout the full style. Texture tip: Passion twists made with curly or wavy hair extension fiber give the burgundy threads a softer, more diffused look rather than a stark stripe. Root tip: Apply a light mousse along the roots every few days to manage new growth frizz without disturbing the twist pattern. Spray tip: A braid and locs refreshing spray keeps the twists and the burgundy threads looking moisturized, soft, and fresh between washes. Remove tip: When it is time to take down, detangle slowly from the ends upward with a wide-tooth comb and plenty of conditioner.
12. Center Part Red Money Piece
A center part red money piece is one of the most symmetrical, intentional color placements possible — the two bold red sections sit on either side of the part, creating a perfectly balanced face frame.
The symmetry gives this look an editorial quality that feels carefully considered and highly visual.
It is one of the most photographed color techniques right now, and for good reason — it is instantly striking on dark hair.


Center tip: A precise, sharp center part is essential for this look — even a slightly off-center part disrupts the symmetrical impact of the money pieces. Narrow tip: Narrow money piece panels — about half an inch to three-quarters of an inch — look the sharpest and most modern on dark hair. Wide tip: For more drama, go up to one-inch panels — the wider the section, the bolder the face-framing effect. Gloss tip: A red color-depositing gloss applied at home every 2–3 weeks maintains the vivid tone between salon visits. Protect tip: Wrap the hair nightly in a satin scarf to protect both the color and the smoothness of the money piece sections.
13. Cherry Highlight Pixie Cut
A pixie cut with cherry highlights placed through the top is a short style that delivers maximum color impact in minimal hair length.
The cherry tones sit through the crown and top layers, adding warmth and movement to what would otherwise be a simple, flat close cut.
The result is playful, fresh, and surprisingly easy to maintain as a daily style.
Cherry tip: Place the cherry highlights specifically through the top-most surface layer of the pixie — this is where they catch the most overhead light. Layer tip: Ask for soft internal layering through the top section so the cherry highlights can shift and move rather than lying flat. Texture tip: A tiny amount of soft wax or pomade worked through the crown creates a piecey texture that shows off the cherry highlights best. Bulk tip: Avoid heavy product on a highlighted pixie — buildup flattens the style and obscures the color variation. Touch-up tip: Cherry pixie highlights need a toner refresh every 4–6 weeks to prevent the vivid tone from fading to an unwanted warm orange.
14. Shoulder Length Flip with Red Underlayer
A shoulder length cut with a red underlayer is the most secretive, playful take on this color trend — the color hides completely until the hair moves or is tucked behind an ear.
The flip styling reveals the underlayer beautifully, creating a moment of vibrant red that disappears again as the hair falls back into place.
It is a perfect choice for anyone who loves color but wants the option to keep it subtle in certain settings.
Underlayer tip: Ask for the red to be applied exclusively to the bottom interior sections of the hair — this is what creates the true peekaboo reveal. Flip tip: A round brush blow-dry that flips the ends outward is the best way to deliberately showcase the red underlayer during styling. Heat tip: Always apply a heat protectant before blow-drying or flat-ironing hair with a color underlayer — heat accelerates color fading significantly. Transition tip: This look works beautifully as the hair grows out — the underlayer simply moves lower on the shaft, maintaining the peekaboo quality naturally. Shade tip: A true red rather than burgundy for the underlayer creates the most surprising, vivid reveal against a dark exterior.
15. Silky Blowout with Red Peekaboo
A silky blowout is already one of the most polished, high-shine styles for Black girls — and a red peekaboo layer beneath the surface adds a warm, unexpected dimension that elevates the whole look.
The exterior stays smooth and deeply dark while the red layer shows only when the hair shifts, creating a delightful color surprise.
The contrast between the sleek dark exterior and the vivid interior color is what makes this combination so visually compelling.
Blowout tip: Use a paddle brush and medium heat for the blowout — this preserves the color in the peekaboo layer while achieving maximum smoothness. Peekaboo tip: Concentrate the red through the crown underlayer and inner sides for the most dramatic reveal with the least color overall. Wrap tip: A tight wrap at night is essential for maintaining a silk press blowout — it preserves both the smooth exterior and the hidden red beneath. Oil tip: A lightweight hair oil applied to the ends after blow-drying enhances the shine and makes the peekaboo red appear more vivid. Wash tip: Limit washing to once a week and always use cool water to protect both the silk press finish and the red color underneath.
16. Sleek Blunt Bob with Red Stripes
A blunt bob and bold red stripes are a combination that looks sharp, graphic, and completely intentional.
The clean-cut edge of the bob gives the red stripes a structured backdrop, and the stripes add a fashion-forward quality to what is otherwise a classic, conservative cut.
A precise center or side part makes the stripe placement look the most deliberate and considered.
Blunt tip: A freshly trimmed, perfectly even blunt edge is essential — uneven ends make the red stripes look less deliberate and the overall style less polished. Stripe tip: Ask for the red stripes to be even in width and spacing — consistency is what gives this graphic look its sharp, editorial quality. Part tip: A sharp center part with red stripes placed symmetrically on both sides creates the most balanced, striking result. Iron tip: Slow, single passes with a flat iron on medium heat produce the smoothest, shiniest finish without damaging the colored sections. Toner tip: A vivid red toner rather than a softer tone is needed here — the graphic quality of stripes relies on bold, visible contrast.
17. High Ponytail with Red Streaks
A sleek, high ponytail with red streaks running through the length is a classic sporty style that feels fresh and current every single time.
The smooth, gel-laid base keeps the ponytail looking polished at the root while the red streaks flow freely through the length for a vibrant, movement-filled finish.
It is an ideal style for active days when you want your hair out of your face but your color fully on display.
Base tip: Use a firm-hold gel and a boar bristle brush to lay the base of the ponytail as smooth and flat as possible before securing. Streak tip: Three to five visible red streaks evenly distributed through the ponytail length is usually enough — too many and the effect loses its sharpness. Wrap tip: After gelling and brushing, wrapping the base of the ponytail with a satin scarf for 5 minutes helps the edges stay smooth longer. Sporty tip: A high ponytail with red streaks looks stunning with minimal makeup — the color does all the work and nothing else needs to compete. Secure tip: Use a strong hair tie reinforced with bobby pins on either side to prevent the ponytail from slipping or drooping throughout the day.
18. Sleek Silk Press with Fine Red Ribbons
A silk press is already one of the most celebrated styles in Black haircare — it showcases the true length and shine of natural hair in a way few other styles can.
Fine red ribbons placed softly through the front layers add dimension and warmth without disrupting the sleek, polished quality of the press.
The ribbons are subtle enough to suit even conservative settings but beautiful enough to feel like a genuine color upgrade.
Ribbon tip: Ask for the fine red ribbons to be placed specifically through the front layers — this placement brightens the face and stays visible. Prep tip: Deep condition and apply a moisture-sealing treatment before the silk press appointment to ensure the hair is strong enough for both heat and color. Scarf tip: Wrap with a silk or satin scarf each night to preserve the silk press and prevent the red ribbons from dulling due to friction. Heat tip: Use a ceramic flat iron rather than titanium for silk pressed hair with color — ceramic provides even heat distribution with less damage risk. Gloss tip: A red or clear color gloss treatment every 3–4 weeks keeps the fine ribbons looking freshly done between full appointments.
19. Subtle Red Highlights on Straight Layers
Subtle red highlights on straight layers are the most understated, every-day-appropriate entry point into this color trend.
The highlights are thin, evenly spaced, and placed to blend into the dark base rather than stand apart from it.
The result reads as a warm, natural-looking dimension that people notice but cannot immediately identify as highlights — it simply looks like beautiful, healthy hair with a slight warmth.
Subtle tip: Request highlights that are no more than 2 levels lighter than the base — this keeps the red subtle and the grow-out completely seamless. Spacing tip: Deliberate gaps between each highlight section let the dark base show through strongly, maintaining the overall dark impression. Crown tip: Placing subtle red highlights around the crown and through the ends creates brightness where it matters most without touching the roots. Gloss tip: A red-tinted gloss refresh every 6–8 weeks prevents the subtle highlights from fading to a dull, brassy non-color. Blend tip: A feathered edge on each highlight section ensures the red blends softly into the dark base rather than sitting in obvious, foil-straight lines.
20. Textured Curly Bob with Red Pops
A textured curly bob is one of the most versatile, flattering short natural styles — full, bouncy, and endlessly wearable.
Red pops placed specifically on the outer curl pattern add vivid color exactly where the curls catch the light, creating a dimensional effect that appears to shift with every movement.
The curl texture naturally disperses the color so it never looks blocky or flat — it simply glows.
Pop tip: Concentrate red highlights on the outermost curl sections at the crown and sides — these catch the most light and produce the most vivid color pop. Bob tip: Keep the bob cut fresh with a trim every 6–8 weeks — a precise shape maximizes the impact of the red pops in the outer layers. Define tip: Curl cream applied to damp hair before air-drying defines each curl individually, ensuring the red pops are clearly visible in the finished style. Gel tip: A light gel scrunched through the ends sets the outer curls where the red pops live and prevents them from frizzing out. Scrunch tip: Scrunch out any crunch after the gel dries with a microfiber towel for soft, defined curls that show off the red beautifully.
21. Two-Strand Twists with Red Tips
Two-strand twists with red-colored tips are a simple, fun, and completely protective way to experience a color moment without any chemical processing on the natural hair.
The red tips add a playful finish to each twist, giving the entire style a warm, sun-touched quality as if the ends were naturally sun-bleached over a long summer.
It is effortless to achieve, easy to maintain, and genuinely striking on dark natural hair.
Tip tip: Use pre-colored extension fiber for the red tips rather than bleaching or dyeing the natural hair — it delivers all the color impact with zero damage. Length tip: Twists that fall to the chest or longer give the red tips the most visual presence — on shorter twists the color may not be as noticeable. Moisture tip: Keep the tips moisturized with a lightweight oil — dry ends make the color appear flat and the twist pattern frizzy. Seal tip: Seal each twist end with a small amount of shea butter or hair butter to lock in moisture and keep the red tips defined. Oil tip: A light oil applied to the full length of each twist every few days adds shine that makes the color in the tips appear more vivid.
Frequently Asked Questions
How do I choose the right shade of red for my skin tone? Warm and deep skin tones look stunning with true red, copper-red, and warm burgundy shades. Fair and neutral skin tones can carry a broader range, from vivid cherry red to cool wine. When in doubt, a red that leans warm or neutral rather than neon or purely cool is the most universally flattering starting point.
Can I get red highlights without bleaching my natural hair? Yes — especially if you use protective styles like braids, twists, or faux locs with colored extension hair added in. For highlights on your own natural hair, some lighter red shades may require a small amount of lifting on dark hair. A professional colorist can assess whether your specific base needs pre-lightening for the red to show clearly.
How do I stop red highlights from fading too quickly? Wash with a sulfate-free shampoo in cool or lukewarm water, limit washing to 1–2 times per week, use a color-depositing conditioner in a matching red tone, and always apply a heat protectant before using any hot tools. Red is one of the fastest-fading color families, so proactive home care between appointments is essential.
Are red highlights damaging to natural Black hair? If done professionally with proper technique, red highlights on natural hair carry a similar risk to other chemical color services. The key is ensuring the hair is in strong, healthy condition before the service and following up with consistent deep conditioning and moisture treatments afterward. Protective styles with colored extensions carry zero damage risk to natural hair.
How long do red highlights typically last on dark hair? Most vivid red highlights begin fading noticeably after 4–6 weeks without a toner refresh. With proper home care — sulfate-free washing, cool water, and protective nighttime wrapping — you can extend the vibrancy to 8–10 weeks. A professional color gloss or toner service is the most effective way to revive the tone between full appointments.
What is the easiest red highlight style to try for the first time? A peekaboo underlayer or a simple face-framing money piece is the most approachable first step. Both techniques introduce color in a targeted, controlled way that is easy to maintain and grows out gracefully. Protective styles with red extension hair are an even lower-commitment option for first-timers.
Why Red Highlights Work So Beautifully on Dark Hair
There is a scientific reason why red highlights look so striking on dark Black hair — the contrast between the two tones is so strong that the color appears more vivid and saturated than it would on lighter bases.
Dark hair acts as a backdrop that amplifies every warm tone placed against it. A cherry cola shade that might look subtle on medium brown hair appears rich and complex on a dark base. A vivid red money piece that would simply brighten a lighter base becomes a true focal point against deep black or dark brown. The depth of the base is not an obstacle to a great red result — it is the very thing that makes it work so well.
The other reason red thrives on this hair type is versatility of form. Red works across braids, natural styles, silk presses, and protective sets in ways that other highlight colors simply cannot. It reads as warm and intentional no matter the texture, the length, or the styling method — which is a rare quality in any color trend.
Fire and Flourish
Red highlights on dark hair are one of the most reliably beautiful color choices a Black girl can make.
The combination of deep base and warm red accent has a richness and dimension that feels both personal and fashion-forward.
Start with the placement that makes you most comfortable — whether that’s a peekaboo layer, a scattered pop through braids, or a bold money piece — and let the color do what it does best.
The most important thing is that it feels like you, worn with full confidence and conviction.


