
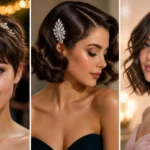
18 Claw Clip Hairstyles for Thin Fine Hair That Actually Hold and Look Fuller
Fine hair and claw clips have a complicated relationship — but once you crack the technique, it changes everything.
The clip itself is almost never the problem.
It’s the prep work, the twist direction, and the placement that determine whether the style holds beautifully or slides down your neck by noon.
Fine strands need a little texture to grip, a gentle twist to add structure, and a clip positioned right where the head curves — not too high, not too low.
Below are 18 claw clip hairstyles for thin fine hair, chosen for their holding power, volume-boosting potential, and genuine two-minute wearability.
Before you start, add a quick spritz of dry shampoo or a light texturizing spray at the roots — freshly washed fine hair is too silky to grip well. Then twist with intention, clip where the curve begins, and always loosen the crown gently with your fingertips after clipping. That last step is what stops the style from looking flat.
1. Soft Braided Half-Up Clip
A half-up style with a small side braid is one of the smartest moves you can make with fine hair.
The braid adds grip right where you need it most, giving the clip something to hold onto rather than smooth strands that slip.
Leaving a few soft pieces around the face prevents the style from looking pulled back and flat — which is the most common mistake with fine hair half-up looks.
Best for: Women with fine, straight, or lightly wavy hair who want a half-up style that actually stays in place all day.
Braid grip tip: Even a tiny three-strand braid at the side creates enough texture to stop the clip from slipping — keep it small and loose.
Face-framing trick: Pull two thin pieces forward at the temples before clipping — this softens the overall look and adds fullness around the face.
Clip choice: A medium matte clip with close-set teeth grips better than a glossy oversized one on fine strands.
Texture prep: A light texturizing spray through the roots before styling gives fine hair the grip it needs to hold.
Occasion: Equally cute for casual days and dressed-up evenings — the braid detail elevates it above a basic half-up.
2. Bob-Length Half-Up Twist
Short hair is not excluded from the claw clip conversation — this style proves it completely.
A bob-length half-up twist takes just the top section, twists it back, and clips it right at the curve of the head for an instant lift effect.
The crown rises slightly, the ends stay light and free, and the whole look takes under ninety seconds to execute.
Best for: Women with bob-length fine hair who want the crown volume boost that a half-up provides.
Short hair clip tip: Use a smaller clip — a large claw clip will overwhelm a bob and won’t clamp securely on a small twist.
Twist direction: Twist the section away from the face and clip pointing downward — this keeps the crown elevated rather than flat.
Texture essential: Texturizing spray through the top section before twisting is non-negotiable for fine hair at this length — it prevents slip.
Volume bonus: After clipping, use your fingertips to gently pull the top of the twisted section upward — this creates crown lift that lasts.
Length note: This technique works from chin-length bobs all the way to jaw-length cuts — any shorter and there isn’t enough to twist.
3. Low Ponytail Clip Hold
Fine-hair ponytails are notorious for slipping, drooping, and looking thinner by the hour — and this technique solves all of that.
Gathering the hair low, giving it one gentle twist, and clamping a clip at the base creates an anchor point that holds far better than a standard elastic on silky fine strands.
The ponytail keeps its soft, touchable quality while the clip provides real structural support from underneath.
Best for: Women with fine hair who need a ponytail that stays in place without pulling or tightening an elastic.
Twist before clip: One single twist before clamping adds enough texture to give the clip teeth something to grip — don’t skip this step.
Low placement: A low ponytail distributes the weight of fine hair more evenly — high ponytails tend to droop faster on fine strands.
Volume at the base: Backcomb or lightly tease the hair right above where the clip sits before gathering — this creates a fuller base.
Clip selection: A clip that closes completely flat against the ponytail base holds better than one that sits open — look for a strong spring mechanism.
Finishing touch: A light mist of flexible hold hairspray over the finished ponytail prevents flyaways without making fine hair stiff.
4. Classic French Twist Clip
The French twist is one of those styles that looks effortlessly elegant regardless of how quickly you did it.
Rolling the hair upward, tucking the ends against the nape, and securing with a vertical clip through the center creates a polished look that genuinely appears salon-level — even on fine hair.
The key is keeping the twist slightly relaxed rather than pulling it tight, which is what prevents fine hair from looking flat and stretched.
Best for: Fine hair of medium length or longer that needs a dressy, polished style in under two minutes.
Volume at the crown: Before twisting, gently backcomb the crown section — this adds height that the clip then secures into place.
Clip direction: Position the clip vertically down the center of the twist for the most secure hold on fine hair.
Loose is better: A slightly undone French twist looks far more elegant than an overly tight one — and it holds better on fine strands too.
Sides tip: Run a light gel or edge control just at the side sections to keep them smooth without flattening the body of the twist.
Occasion ready: This style transitions from a work meeting to a dinner event with zero re-styling required.
5. Textured Twist Bun
The biggest mistake fine-haired women make with a claw clip bun is trying to make it look too smooth.
A textured, slightly undone twist bun actually looks fuller and more intentional than a slicked-back one — the small bits of texture create the visual impression of more hair.
Folding the hair into a loose knot rather than a tight coil before clipping is the technique that makes all the difference here.
Best for: Women with fine hair who want an everyday bun that looks full and relaxed rather than sparse and flat.
Texture before clipping: Scrunch a small amount of sea salt spray or dry shampoo through the hair before twisting — this is the single most impactful prep step for this style.
Knot looseness: Fold the hair into a soft, open loop rather than winding it into a tight coil — the air inside the bun creates perceived volume.
Crown lift: After clipping, use two fingers to gently pull the top of the bun upward and outward — this adds height and fullness instantly.
Clip grip: Push the clip through the center of the bun and into the base section underneath for the most secure hold.
Second-day magic: This bun genuinely looks better on second-day hair — the natural texture and slight grease provide exactly the grip fine hair needs.
6. Soft Updo With Curtain Pieces
Face-framing pieces are one of the most underrated tools for making fine hair look fuller and more voluminous in an updo.
Clipping the back section up into a relaxed updo and then deliberately releasing the front layers to fall forward creates a softness around the face that disguises how fine the hair actually is.
The movement around the cheeks draws attention away from the nape and toward the face — exactly where you want focus.
Best for: Fine hair of shoulder length or longer that needs a style balancing elegance with effortlessness.
Curtain piece width: Release a section no wider than one finger on each side — too much hair out defeats the purpose of the updo.
Wave the pieces: A quick wrap around a medium barrel iron gives the curtain pieces a soft bend that makes them look thicker and more intentional.
Updo relaxation: Don’t pull the back section too tight — a slightly loose, relaxed updo looks fuller and more romantic on fine hair.
Day-to-night transition: Start with the curtain pieces straight for day, then wave them in the evening for an instant dressy upgrade.
Clip style: A decorative clip in tortoiseshell or metal adds a beautiful detail to the back of this style that makes it feel finished.
7. Low Twist With Pearl Clip
A low twist secured with a pearl or decorative clip is one of the most elegant two-minute styles available for fine hair.
The twist keeps the hair controlled and off the neck without pulling it tight against the scalp, which is crucial for preventing fine hair from looking flat and thin at the back.
The decorative clip does double duty — it holds the style securely while drawing the eye to the nape in a beautiful, intentional way.
Best for: Fine hair worn to the shoulder or below that needs a polished, occasion-appropriate style with minimal effort.
Looseness level: The twist should feel like it could almost come undone — that relaxed tension is what keeps fine strands from being pressed flat.
Pearl clip placement: Position the clip horizontally across the base of the twist rather than vertically — this distributes the holding force more evenly through fine hair.
Flyaway control: A light mist of hairspray over the finished style, held at arm’s length, smooths flyaways without flattening the twist.
Nape prep: Smooth just the lower nape section with a boar bristle brush before twisting — this gives the pearl clip detail a clean backdrop to sit against.
Color coordination: A pearl or ivory clip looks stunning against dark brunette and silver hair; gold-toned clips suit warm blonde and copper shades.
8. Half-Up Clip With Soft Crown Lift
Crown lift is the single most flattering thing you can give fine hair — and this half-up style delivers it directly.
Gathering the top section, twisting it once, and positioning the clip so the hair sits fractionally raised rather than pressed flat creates an elevated silhouette that makes fine strands look noticeably thicker.
The style holds its lift comfortably all day without pins or additional support, making it ideal for long wear.
Best for: Fine hair of any length that tends to separate and lie completely flat by midday.
Clip position: Place the clip slightly higher on the head than feels natural — the hair will settle slightly once clipped, so starting high maintains the lift.
Twist number: One twist only before clipping — two or more pulls the hair too tight and eliminates the volume at the crown.
Loosening technique: After clipping, place two fingers under the clipped section and gently push forward — this creates a subtle pouf at the crown without looking overdone.
Texture spray timing: Apply texturizing spray to the top section before gathering, not after — this gives the twist grip before it even reaches the clip.
All-day hold: This style is particularly well-suited to fine hair because it doesn’t rely on elastics that can gradually pull the hair downward.
9. Half-Up Micro Bun
The micro bun is proof that you don’t need a lot of hair to create a style with real presence and personality.
Taking just the top half of the hair, twisting it into a small loop, and clipping it in place creates a compact bun that sits high enough at the crown to add visible lift.
Allowing the ends to fan out slightly from the clip rather than tucking them all in gives the micro bun a fuller, more dimensional appearance.
Best for: Fine hair of any length — particularly effective on second-day hair when natural texture provides better grip.
Loop size: The smaller the loop the better — a compact micro bun looks fuller and more intentional than a large loose one on fine hair.
End fanning: After clipping, gently pull the ends outward in different directions to create a fanned effect — this adds visual bulk to fine hair.
Second-day advantage: Micro buns genuinely work better with a little oil or dryness in the hair — fresh-washed fine hair is too slippery for this style.
Clip size match: Use a clip that matches the loop size exactly — an oversized clip on a small bun looks clumsy and won’t grip properly.
Quick refresh: If the micro bun flattens during the day, unclip, add a small spritz of dry shampoo, re-twist, and reclip — takes fifteen seconds.
10. Half-Up Clip With Loose Face Frame
When fine hair goes flat quickly, the solution isn’t always more product — sometimes it’s strategic placement and deliberate looseness.
This style clips the top half of the hair back while keeping the front sections out and gently curled, creating a soft frame around the face that makes the overall style look considerably fuller than it actually is.
The contrast between the secured back section and the free front pieces creates dimension that fine hair desperately needs.
Best for: Fine hair that loses volume within hours of styling and needs a look that can maintain its fullness all day.


Curl the front pieces: Wrap the face-framing sections around a medium barrel iron once before clipping the back — the curl adds body that flat pieces simply don’t have.
Section width: Keep the face frame sections to roughly the width of one finger on each side — too wide and the back section looks sparse.
Dry shampoo strategy: Apply dry shampoo to the roots of the back section before clipping — it adds grip that prevents the clip from sliding.
Crown loosening: After clipping, use fingertips to gently lift and separate the crown strands — this creates the elevated silhouette that makes fine hair look fuller.
Clip height: Clip at the back of the crown rather than lower down — higher placement creates more visible lift from the front.
11. Low Side Twist Clip
A low side twist is the best choice when you want hair fully off the neck without any of the harsh tension that a tight ponytail creates on fine strands.
Sweeping all the hair to one side, giving it a gentle twist, and clamping the clip just behind the ear creates a romantic, asymmetrical shape that adds surprising fullness to the style.
The side direction means the body of the twist sits visibly rather than lying flat down the back of the head.
Best for: Fine hair of shoulder length or longer that needs an off-the-neck style with a soft, romantic feel.
Sweep direction: Sweep to the side opposite your natural part — this creates a slightly lifted, fuller look at the root area.
Twist tightness: Keep the twist loose and open rather than spiraling it tightly — a looser twist looks fuller on fine hair.
Behind-the-ear placement: Positioning the clip behind the ear rather than at the nape keeps the style visible and adds shape to the profile.
Face-framing option: Leave a thin piece free at the front on the sweep side — it softens the style and draws attention to the face.
Occasion range: This style is versatile enough for a casual brunch, a work meeting, or an evening out — it reads differently depending on the clip you choose.
12. Pearl Bar Clip Chignon
The chignon is one of the most universally flattering low styles, and using a pearl bar clip to secure it turns a practical updo into something genuinely beautiful.
Twisting the hair into a soft coil at the nape and securing it with a decorative bar clip creates a finished look that appears far more considered than a simple bun or ponytail.
The slight looseness of the coil is essential — this is what prevents fine hair from looking sparse and flat at the back.
Best for: Fine hair of medium to longer length that needs a polished, low style for professional or formal occasions.
Coil looseness: Wind the hair into the coil with one loose turn rather than multiple tight ones — fine hair looks denser when it takes up more space.
Pearl clip grip: Push the bar clip through the coil horizontally, catching the base of the coil underneath as well as the top — this creates a two-point anchor.
Nape prep: Smooth just the outermost layer of the chignon with a fine-tooth comb before securing — the pearl detail deserves a clean backdrop.
Volume preservation: Don’t pull the coil completely flat against the head — letting it sit slightly away from the nape creates fullness that fine hair benefits from enormously.
Clip aesthetics: A horizontal pearl bar adds elegant width to the chignon shape — a vertical clip would make the style look narrow and less impactful.
13. Volumized Clip Updo
The volumized updo is the style to reach for when you need maximum crown impact from fine hair.
Gathering the hair, twisting it upward rather than downward, and positioning the clip so the top section lifts away from the scalp is the technique that creates the distinctive height this style is built on.
Fine hair looks significantly thicker and more substantial when it isn’t pressed tight against the head.
Best for: Fine hair at any length where crown flatness is the primary concern and maximum volume is the goal.
Root powder trick: Apply a small amount of volumizing powder or dry shampoo directly at the roots before gathering — this product creates grip and lift simultaneously.
Upward twist direction: Twist the hair upward toward the ceiling rather than pulling it backward — this vertical direction is what builds the crown height.
Clip placement: Position the clip horizontally across the twist so it holds the lifted section firmly without allowing it to drop.
Finger-pull technique: After clipping, place your fingertips at the very top of the secured section and pull gently outward in all directions — this amplifies the volume significantly.
Long-wear styling: This style holds its lift better than most claw clip looks because the upward twist creates tension that works with gravity rather than against it.
14. Clipped Half-Up With Wispy Bangs
Wispy bangs and a clipped half-up style are one of the most effective combinations for making fine hair look naturally full.
Clipping the back section while leaving the bangs loose and slightly piecey at the front creates a layered impression — the free fringe adds a soft, airy quality that disguises the sparseness that fine hair can sometimes show.
Curling the bang ends slightly adds just enough curve to give fine strands extra visible body.
Best for: Fine hair with bangs or a fringe that wants a cute, everyday style that looks effortlessly put-together.
Piecey bang technique: After clipping the back, run fingertips lightly through the bangs — separating them slightly into pieces makes fine fringe look fuller than smoothing it down.
Curl the ends: A quick wrap around a small barrel iron gives the bangs a soft bend that adds body without making them look heavily styled.
Clip height: Place the clip at the crown rather than lower on the head — this creates lift that flows naturally into the fringe section.
Texture through bangs: A tiny amount of texturizing paste worked through the bang tips with fingertips adds definition that lasts all day.
Volume maintenance: If the bangs go flat midday, a single pass of a fine-tooth comb through the roots lifts them back to their original shape instantly.
15. Sleek Tucked French Twist
When you want clean lines and a polished finish rather than texture and volume, the sleek French twist is the style to choose.
Smoothing the hair back, rolling it upward into a vertical column, tucking the ends cleanly, and clipping down the center creates a precise, elegant look that holds remarkably well even on very fine strands.
The sleekness of this style is actually an advantage for fine hair — it’s intentionally smooth, so there’s nothing sparse-looking about it.
Best for: Fine hair of medium length or longer that needs a clean, professional, polished look for formal occasions.
Smoothing prep: Run a boar bristle brush through the hair before twisting — the smoothness of the brush distributes natural oils that help fine hair behave.
Tuck security: Tuck the ends firmly against the scalp before clipping — any ends peeking out will unravel the style quickly on fine hair.
Clip direction: Push the clip downward through the twist toward the scalp rather than across — this direction holds the tuck firmly in place.
Edge control: A very light application of gel along the sides keeps the smooth sections flat without making fine hair look wet or stiff.
Touch-up ease: If any strands escape during the day, a bobby pin in a matching shade tucks them back invisibly without disturbing the overall style.
16. Small Ponytail With Claw Clip
Using a claw clip instead of an elastic for a ponytail is a surprisingly impactful upgrade for fine hair.
Gathering the hair, giving it one twist, and clamping the clip so the ponytail sits slightly lifted rather than dragging straight down creates a gentle upward curve that makes the ponytail look noticeably fuller.
The clip also distributes pressure more broadly than an elastic, which means no single section of fine hair is being pulled thin.
Best for: Fine hair of any length that wants a simple, comfortable ponytail that holds its shape and volume better than an elastic.
Placement height: Position the clip at mid-level rather than very high or very low — mid-level creates the most balanced, flattering ponytail on fine hair.
Twist before gathering: One twist of the gathered hair before clamping creates enough texture for the clip to grip without slipping.
Curve creation: After clipping, use your finger to push the ponytail upward slightly at the base — this creates a gentle upswept curve that makes fine hair look thicker.
Clip vs elastic: A clip distributes pressure over a wider area than an elastic, which means less tension on any single fine strand — better for hair health too.
Length works with: This technique works from short ponytails of three or four inches all the way through long hair — adapt the clip size to the ponytail thickness.
17. Sleek Low Bun With Taupe Clip
A sleek low bun is the workhorse of professional hairstyling — and choosing a clip in a tone close to your hair color makes it look like a considered choice rather than a practical one.
Coiling the hair into a tight, neat bun at the nape and securing with a medium clip that catches both the coil and its base underneath creates a style that genuinely holds all day without pins or support.
For fine hair, matching the clip tone to the hair color is especially important — it keeps the hardware from drawing attention to how thin the bun actually is.
Best for: Fine hair needing a neat, work-appropriate style that stays secure and professional-looking for eight or more hours.
Tone matching: A clip in taupe, warm brown, or cool ash that matches your hair color makes the clip almost invisible — drawing attention to the bun shape rather than the accessory.
Coil tightness: Wind the hair into a tighter coil than you would for a casual style — a neat, compact low bun stays in place longer on fine hair.
Clip grip technique: Push the clip through the center of the coil and then angle it downward to catch the base hair underneath — this two-layer grip is what keeps fine hair from sliding.
Nape smoothing: A small amount of light gel on a fine-tooth comb, run through just the nape section, keeps the low bun looking crisp rather than fluffy.
Refresh strategy: If the bun loosens during the day, simply unclip, re-coil slightly tighter, and reclip — the whole process takes about twenty seconds.
18. Clipped Half-Up With Soft Crown Texture
This final style is the everyday workhorse of the collection — easy enough for Monday morning, pretty enough for a last-minute invite.
Gathering the top section with deliberate looseness and clipping it with a textured finish at the crown creates a look that balances casual and put-together in exactly the right proportion.
The crown texture is created by very gently pulling individual strands upward after clipping — a ten-second step that turns a flat half-up into something that looks genuinely voluminous.
Best for: Fine hair of any length that needs a reliable, confidence-boosting style for daily wear.
Texture creation: After clipping, place fingertip and thumb on small sections at the crown and gently pull each one upward — work across the entire clipped section for an even, full result.
Section width: Gather roughly the top third of the hair for this style — too much hair in the clip and the crown loses its lift; too little and the style looks sparse.
Product timing: Apply texturizing spray to dry hair ten minutes before clipping — letting it sit gives the product time to create the grip that fine hair needs.
Clip choice: A medium matte clip in a neutral tone is the most versatile choice for this style — it works with any hair color and every outfit.
Duration: This is a style that genuinely holds for six to eight hours on fine hair when done with texturized, non-freshly-washed hair.
FAQs
Why does my claw clip keep sliding out of fine hair? Fine hair is naturally smooth and silky, which means clip teeth have very little to grip onto. The fix is adding texture before clipping — dry shampoo or a light texturizing spray at the roots gives fine strands the surface grip they need. Also check your clip size: an oversized claw clip may not clamp tightly enough on a small twist of fine hair.
What is the best claw clip size for thin, fine hair? A small to medium clip generally performs best on fine hair. It closes more completely around a smaller twist, which creates a firmer hold. Very large clips tend to sit open rather than fully clamping, which leads to slipping. If your hair is very fine or short, look for clips with close-set teeth and a strong spring mechanism.
How can I make a claw clip style look fuller on fine hair? The most effective technique is avoiding over-smoothing before clipping. Fine hair looks fuller when clipped with some texture rather than perfectly brushed. After clipping, always loosen the crown gently with your fingertips, let a few face-framing pieces fall forward, and never pull the clip position too tight against the scalp.
Can claw clips damage fine hair over time? Claw clips are actually gentler on fine hair than elastics when used correctly. They distribute pressure more broadly and don’t create the single pressure point that elastic bands do. The key is not clamping too tight and not positioning the clip in exactly the same spot every single day — rotating placement keeps fine strands healthy.
What products help claw clip styles hold longer on fine hair? Dry shampoo is the top recommendation — apply it to the roots before clipping for grip and volume simultaneously. A light texturizing spray works similarly on hair that doesn’t need oil absorption. Avoid heavy serums or smoothing products on the day you plan to use a claw clip — silky, slippery hair fights every clip style you attempt.
Do claw clip styles work on very short fine hair? Yes — the bob-length half-up twist and the small ponytail clip technique both work well on shorter fine hair. The key is using a smaller clip and focusing on the top section only rather than trying to gather all the hair. Even a quarter-inch of twist gives a clip enough grip to hold on shorter fine strands.
The Tiny Clip That Changed Fine Hair Forever
Claw clips quietly moved from a 90s relic to a genuine modern hair essential — and women with fine hair are arguably the biggest beneficiaries of that comeback. The reason is simple: clips create fullness through technique rather than volume products, which means fine hair gets the shape it needs without being weighed down by heavy styling products. A well-placed twist and clip can do more for fine hair’s appearance in sixty seconds than a full styling routine with hot tools.
What makes claw clips particularly powerful for fine hair is the combination of grip and lift they offer in one motion. When you twist before clipping and loosen after, you’re essentially building a small internal structure that holds the hair away from the scalp — creating the visual impression of more hair than is actually there. That’s a trick no elastic band or bobby pin can replicate with the same speed and simplicity.
Little Clip, Big Impact: A Final Word
Fine hair doesn’t need more products or longer routines — it needs smarter techniques, and a claw clip used correctly is one of the smartest tools available.
Start with textured, not freshly washed hair, twist with deliberate looseness, and always take thirty seconds to loosen the crown after clipping — that combination alone will transform every style on this list.
Save two or three of these ideas to rotate through your week and notice how quickly confident hair becomes just part of your morning routine.
The right clip, in the right place, on the right texture of hair — that’s genuinely all it takes.


